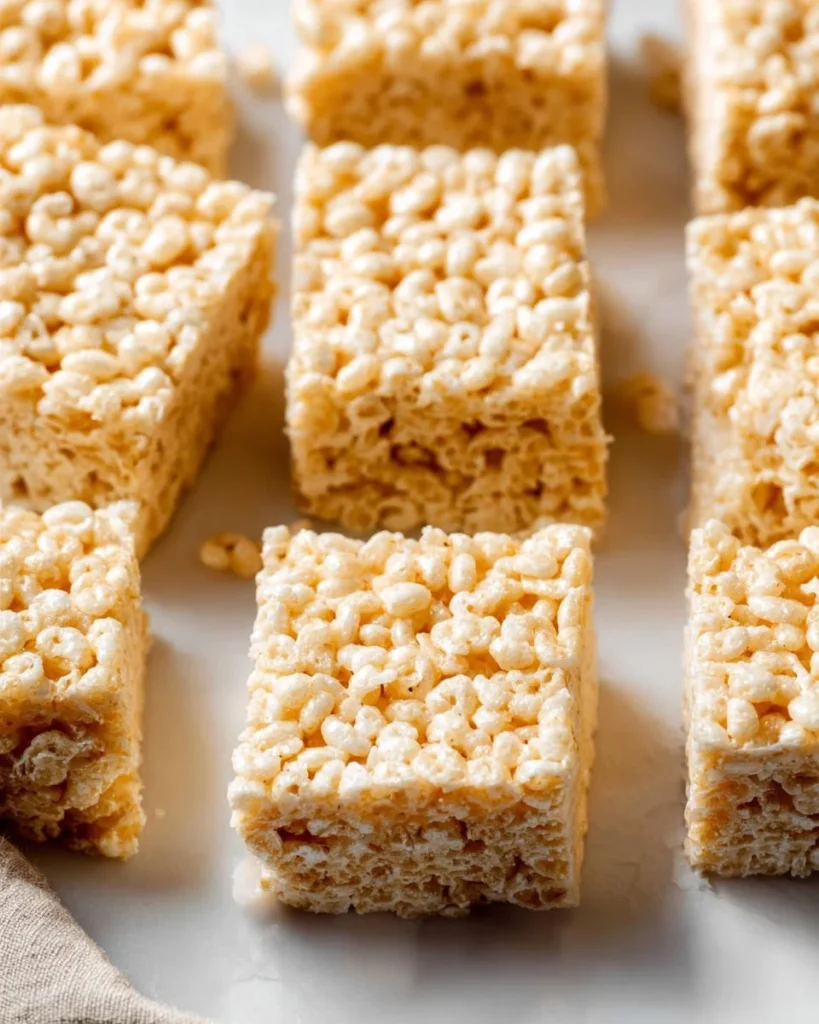
Rice Krispie Treats
A classic tray of Rice Krispie Treats is warm, nostalgic, and utterly simple to make. Each square combines buttery richness with a soft but slightly chewy center and a crisp, airy crunch from the cereal. The aroma is pure comfort, with melted marshmallow and vanilla filling the kitchen and bringing back childhood memories. These bars are ideal for after-school snacks, bake sales, potlucks, holiday trays, or anytime you want a quick, no-bake dessert that everyone loves. If you enjoy easy, family-friendly recipes, this version is a perfect go-to and pairs well with other simple treats and savory dishes like a quick stir fry for a complete casual meal experience. For a playful spin on no-fuss sweets, see this easy twist for kids that showcases other rice-based ideas.
Ingredients
- 3/4 cup unsalted butter, melted gently so it does not brown. Provides richness and helps the marshmallows melt smoothly.
- Two 10-ounce bags mini marshmallows, about 20 ounces total. These give the bars their sweet, chewy structure and sticky binding power.
- 1/2 teaspoon pure vanilla extract, added off the heat for a warm, rounded flavor note.
- Pinch of salt, to balance sweetness and enhance flavor.
- 9 cups crispy rice cereal, for the light, crunchy texture that defines this treat. For a firmer bar, press more firmly when spreading.
Step-by-Step Instructions
- Line a 9×13-inch baking pan with parchment paper and lightly grease it. This makes it easy to lift the whole slab out and cut clean squares.
- In a large pot, melt the unsalted butter over medium heat, ensuring it does not brown. Keep the heat moderate so the butter stays golden but not toasted.
- Once melted, add the mini marshmallows and stir until completely melted and smooth. Work quickly and stir continuously so the marshmallows melt evenly.
- Remove from heat and stir in the vanilla extract and a pinch of salt. Adding vanilla off the heat preserves its delicate aroma.
- Fold in the crispy rice cereal until evenly coated. Use a gentle folding motion to keep the cereal from crushing while ensuring everything is well mixed.
- Transfer the mixture to the prepared baking pan and spread it out, pressing down lightly. Use a piece of parchment or a lightly greased spatula to press evenly without compacting too hard.
- Allow to set at room temperature for at least 1 hour. This resting time helps the marshmallow set so the bars cut cleanly.
- Once set, lift out using the parchment, cut into squares, and store in an airtight container. For neat edges, chill briefly before cutting.
Recipe Details
- Prep Time: 10 minutes
- Cook Time: 5 minutes
- Total Time: 1 hour 15 minutes (includes setting time)
- Servings: Makes 12 generous squares
- Calories: Approximately 335 kcal per serving
For another simple no-bake option using minimal ingredients, you might enjoy this clear gelatin treats recipe that uses basic pantry items.
Tips, Storage & Variations
- Practical tips: Work quickly when marshmallows are melted, as they begin to set as they cool. Warm your spatula or spoon in hot water and dry before pressing to prevent sticking.
- Pressing: Press lightly for fluffier bars or more firmly for denser, compact bars that hold together better for gifting.
- Storage: Store in an airtight container at room temperature for up to 3 days to maintain chewiness. Separate layers with parchment to avoid sticking.
- Freezing: Wrap individual squares in plastic wrap and store in a freezer-safe container for up to 2 months. Thaw at room temperature before serving.
- Flavor variations using only the existing ingredients:
- Increase the vanilla to 1 teaspoon for a stronger vanilla aroma.
- Use slightly more marshmallows for a chewier, sweeter bar.
- Reduce the marshmallows by one 10-ounce bag and add a touch more butter to adjust texture for a less sweet, firmer bar.
- For inspiration on pairing simple cereal treats with family meals, check out this guide to pan-friendly rice recipes.

FAQ
- Can I use regular marshmallows instead of mini marshmallows?
Yes. Use the same total weight of marshmallows and allow a few extra minutes to fully melt larger pieces. - Do I need to grease the parchment paper?
A light grease helps the mixture release smoothly, though parchment alone will often work. - How long will these stay soft at room temperature?
Stored in an airtight container, they stay soft for about 2 to 3 days. - Can I make smaller or larger pans?
Yes. If using a smaller pan, the bars will be thicker and take longer to set. Adjust cutting size accordingly. - Why did my bars turn out hard?
Overheating the marshmallows or pressing too firmly can make bars dense and firm. Melt gently and press lightly. - Is it necessary to add salt?
A pinch of salt enhances flavor, but you can omit it if needed.
People Also Ask
- How do I prevent Rice Krispie Treats from becoming sticky?
Let them cool fully at room temperature before storing and use parchment between layers to prevent sticking. - What is the best way to cut neat squares?
Chill the slab briefly or use a hot, dry knife wiped between cuts for clean edges. - Can I make Rice Krispie Treats ahead of time?
Yes, prepare and store in an airtight container for up to 3 days, or freeze for longer storage. - Why did my marshmallows seize up while melting?
High heat or inconsistent stirring can cause marshmallows to seize; lower the heat and stir continuously. - Can I use flavored rice cereal?
Only use the provided crispy rice cereal in this recipe, but flavored cereal will change sweetness and texture. - How do I make thicker Rice Krispie Treats?
Use a smaller pan or press more firmly when spreading the mixture. - Will these bars stick to the pan without parchment?
They will stick more and be harder to remove neatly; parchment with light grease is recommended.
Conclusion
Give these Rice Krispie Treats a try when you want a quick, comforting sweet that sets up with minimal fuss. They are perfect for sharing at gatherings, packing for lunchboxes, or making with kids. For extra tips and a different take on the classic, see Best Rice Krispie Treats (Recipe + Video) – Sally’s Baking Addiction, and for the original version from the brand, check The Original Rice Krispies Treats™ Recipe. If you make a batch, please share how it turned out and pass the joy along with someone you love. Enjoy every chewy, crunchy bite.
PrintRice Krispie Treats
A classic tray of Rice Krispie Treats that combine buttery richness with a crisp, airy crunch from the cereal. Quick and perfect for any occasion.
- Prep Time: 10 minutes
- Cook Time: 5 minutes
- Total Time: 75 minutes
- Yield: 12 servings 1x
- Category: Dessert
- Method: No-Bake
- Cuisine: American
- Diet: Vegetarian
Ingredients
- 3/4 cup unsalted butter, melted
- Two 10-ounce bags mini marshmallows (about 20 ounces total)
- 1/2 teaspoon pure vanilla extract
- Pinch of salt
- 9 cups crispy rice cereal
Instructions
- Line a 9×13-inch baking pan with parchment paper and lightly grease it.
- Melt the unsalted butter in a large pot over medium heat, ensuring it does not brown.
- Add the mini marshmallows and stir until completely melted and smooth.
- Remove from heat and stir in the vanilla extract and a pinch of salt.
- Fold in the crispy rice cereal until evenly coated.
- Transfer the mixture to the prepared baking pan and spread it out.
- Allow to set at room temperature for at least 1 hour.
- Lift out using the parchment, cut into squares, and store in an airtight container.
Notes
Work quickly with the melted marshmallows and use light pressure when pressing to keep the bars fluffy.
Nutrition
- Serving Size: 1 serving
- Calories: 335
- Sugar: 15g
- Sodium: 150mg
- Fat: 12g
- Saturated Fat: 7g
- Unsaturated Fat: 5g
- Trans Fat: 0g
- Carbohydrates: 45g
- Fiber: 1g
- Protein: 2g
- Cholesterol: 30mg
Keywords: Rice Krispies, no-bake dessert, treats, childhood snacks, easy recipes