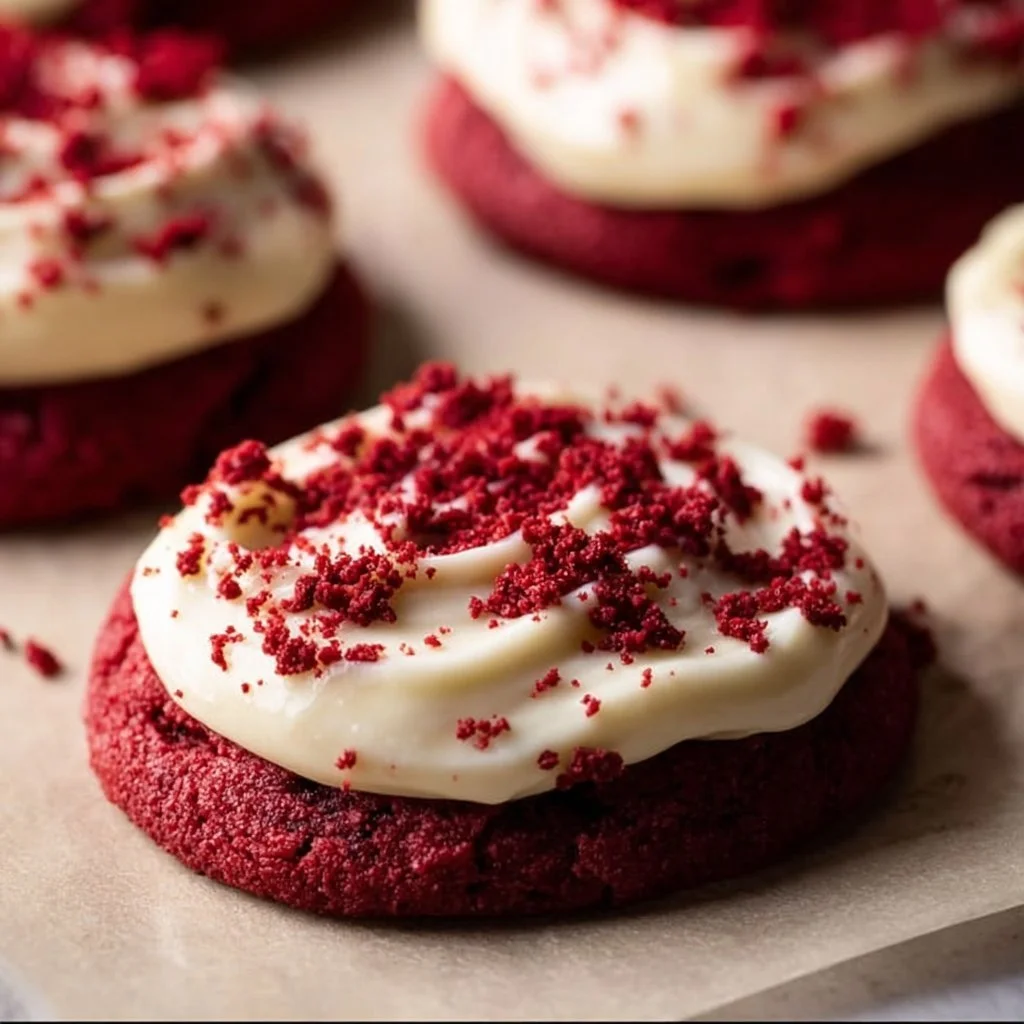
Frosted Red Velvet Cupcake Cookies
Indulge in the delightful fusion of cupcakes and cookies with these Frosted Red Velvet Cupcake Cookies. Imagine sinking your teeth into a soft, chewy cookie that boasts the rich, velvety flavor of traditional red velvet cake, topped with a luxurious cream cheese frosting. The exquisite aroma of cocoa and vanilla fills your kitchen as these cookies bake, creating an inviting atmosphere perfect for any occasion. Whether you’re celebrating a birthday, planning a holiday gathering, or simply treating yourself, these vibrant cookies are sure to impress. Their visually appealing color and decadently creamy topping make them a fantastic choice for both casual snacking and special events.
Ingredients
- 1 & 1/2 cups all-purpose flour: Acts as the base for the cookies, providing structure.
- 1/4 cup unsweetened cocoa powder: Gives the cookies their chocolatey flavor and enhances the red hue.
- 1 tablespoon instant milk powder: Adds creaminess and richness to the cookie dough.
- 1 tablespoon cornstarch: Creates a tender texture, making the cookies soft and chewy.
- 1/2 teaspoon baking powder: Helps the cookies rise and achieve a fluffy texture.
- 1/4 teaspoon baking soda: Works with the vinegar to give the cookies a slight lift.
- 1/4 teaspoon salt: Balances the sweetness and enhances the overall flavor.
- 1/2 cup unsalted butter, softened: Provides richness and moisture to the cookies.
- 3 tablespoons vegetable oil: Keeps the cookies moist and tender.
- 1/2 cup packed brown sugar: Adds a deep, caramel-like flavor and helps retain moisture.
- 1/2 cup granulated sugar: Sweetens the cookies and contributes to their texture.
- 1 large egg: Binds the ingredients together and adds richness.
- 1 teaspoon pure vanilla extract: Infuses a warm, sweet flavor into the dough.
- 1 teaspoon white vinegar: Reacts with baking soda, enhancing the red color and texture.
- 1 to 2 teaspoons red liquid-gel food coloring: Gives the cookies their signature vibrant red color.
- 3 ounces cream cheese: Forms the base of the creamy frosting, providing a tangy flavor.
- 6 tablespoons unsalted butter, softened: Complements the cream cheese for a smooth, rich frosting.
- 1 teaspoon pure vanilla extract: Adds depth of flavor to the cream cheese frosting.
- 1 & 1/2 cups powdered sugar: Sweetens and thickens the frosting for a perfect spreadable texture.
Step-by-Step Instructions
- In a medium bowl, whisk together the all-purpose flour, cocoa powder, milk powder, cornstarch, baking powder, baking soda, and salt. Set this dry mixture aside.
- In a large bowl, mix the softened butter, vegetable oil, brown sugar, and granulated sugar until smooth and creamy.
- Whisk in the egg and vanilla extract. Add the white vinegar and food coloring, stirring until you achieve your desired red color.
- Gradually fold the dry mixture into the wet mixture until a thick dough forms. Do not overmix; just combine until no dry spots remain.
- Use a large cookie scoop to portion out the dough onto parchment-lined baking sheets, spacing them adequately for spreading.
- Bake in a preheated oven at 350°F (175°C) for 12-15 minutes, or until the cookies are puffed and the edges are lightly golden brown.
- Let the cookies cool on the baking sheets for about 5 minutes before transferring them to a wire rack to cool completely.
- To prepare the frosting, cream together the cream cheese and softened butter in a bowl. Add vanilla extract, then incorporate powdered sugar until smooth and fluffy.
- Pipe or spread the cream cheese frosting generously onto the cooled cookies.
- If desired, sprinkle any cookie crumbles over the frosting for additional texture and flair.
Recipe Details
- Prep Time: 20 minutes
- Cook Time: 15 minutes
- Total Time: 35 minutes
- Servings: 12 cookies
- Calories: Approximately 200 calories per cookie
Tips, Storage & Variations
- Tips: Make sure your butter is softened to room temperature for easy mixing. Use gel food coloring for a deeper, more vibrant color.
- Storage: Store the cookies in an airtight container at room temperature for up to 3 days, or refrigerate for up to a week.
- Freezing: Freeze un-frosted cookies by placing them in a single layer in a freezer-safe container for up to 3 months. Frost them after thawing.
- Variations: Mix in chocolate chips or chopped nuts into the dough for added texture. You can also use a different color of food coloring to create a unique twist.
FAQ

Can I make these cookies ahead of time?
Yes, you can bake the cookies ahead of time and store them in an airtight container or freeze them un-frosted.What can I use instead of cream cheese for the frosting?
You can substitute cream cheese with mascarpone cheese for a different flavor profile.How do I make the cookies firmer?
If you prefer firmer cookies, you can chill the dough for about 30 minutes before baking.Can I reduce the sugar in the recipe?
Yes, you can reduce the sugar slightly, but be mindful that it might affect the texture and flavor.How do I know when the cookies are done?
The cookies should be puffed and the edges lightly golden brown. They will firm up as they cool.
People Also Ask (PAA) Expansion
What is the origin of red velvet cake?
Red velvet cake originated in North America, becoming popular in the 1920s and known for its distinct reddish hue.How do you make cookies chewy?
To make cookies chewy, use brown sugar instead of all granulated sugar, and do not overbake them.Can I add nuts to the cookie dough?
Yes, feel free to mix in chopped walnuts or pecans for added crunch.How should I store leftover cookies?
Store leftover cookies in an airtight container at room temperature or in the refrigerator if frosted.What is the best way to frost cookies?
Use a pastry bag for piping if you want decorative designs; otherwise, a simple spatula works well for spreading frosting.Can I substitute the all-purpose flour with gluten-free flour?
Yes, you can use a gluten-free all-purpose flour blend, but results may vary slightly in texture.
Conclusion
These Frosted Red Velvet Cupcake Cookies are not just a treat; they are a delightful experience that combines nostalgia with a modern twist. We hope you give this recipe a try and enjoy every delicious bite. Share your creations and make unforgettable memories with friends and family. There’s nothing quite like the joy of baking and savoring these vibrant, mouthwatering cookies. Happy baking!