
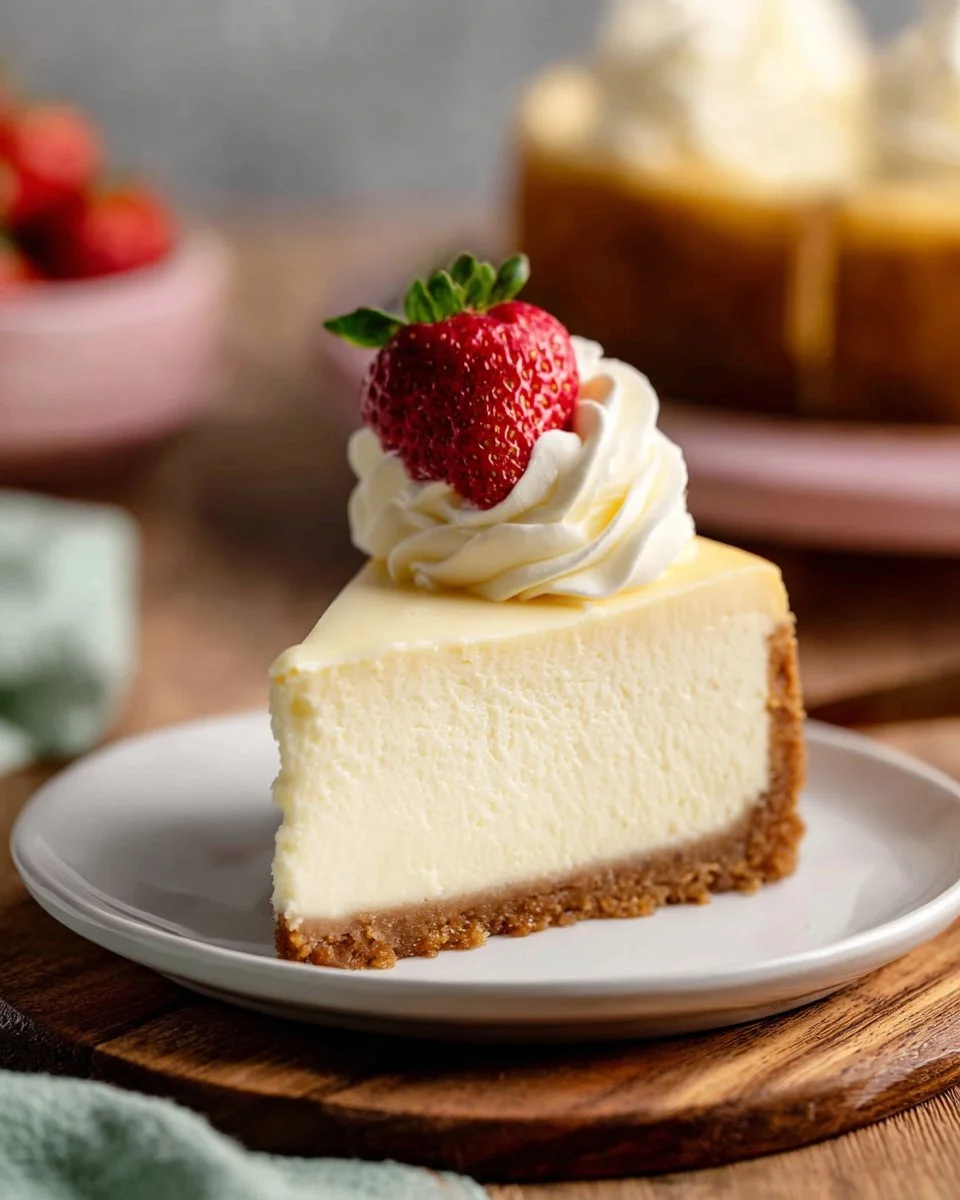
Cheesecake
A classic, velvety cheesecake that balances rich cream cheese with a crisp graham cracker crust. This cheesecake has a silky, dense texture that melts on the tongue, a mild tang from sour cream and optional lemon, and a warm baked aroma that fills the kitchen. It is ideal for special occasions, holiday dinners, or any time you want an impressive dessert that can be made ahead. If you enjoy creative twists, you might like a fall take on cream cheese desserts like caramel apple cheesecake bars, which share that same creamy base in a portable form.
Ingredients
- 1 and 1/2 cups (180g) graham cracker crumbs, finely crushed. Provides the crunchy, slightly sweet base for the crust.
- 1/4 cup (50g) granulated sugar. Sweetens the crust and helps it bind.
- 5 Tablespoons (71g) unsalted butter, melted. Adds richness and helps the crumbs set when baked.
- 32 ounces (904g) full-fat brick cream cheese, softened. The main body of the cheesecake, for a rich, dense texture.
- 1 cup (200g) granulated sugar. Sweetens the filling; dissolve fully for a smooth result.
- 1 cup (240g) full-fat sour cream. Adds creaminess and a gentle tang that keeps the filling from being too dense.
- 1 teaspoon pure vanilla extract. Brings depth and balances the dairy flavors.
- 2 teaspoons fresh lemon juice (optional). Brightens flavor if you prefer a subtle citrus note.
- 3 large eggs. Provide structure and a silky finish when baked carefully.
A note on the crust ingredients: if you prefer a firmer crust, press the crumbs more firmly into the pan before baking. For more flavor, you can pulse the crackers slightly coarser.
Step-by-step Instructions
Preheat and prepare. Preheat your oven to 350°F (177°C). Position the oven rack in the lower third for the water bath so the top of the cheesecake does not brown too quickly.
Tip: Place a sheet pan on the rack below to catch any drips from the water bath.Make the crust. In a bowl, combine the graham cracker crumbs, 1/4 cup (50g) granulated sugar, and the melted butter. Stir until the crumbs are evenly moistened.
Press and bake the crust. Press the crumb mixture firmly and evenly into the bottom of a 9-inch springform pan. Bake for 10 minutes, then remove from the oven and set aside to cool slightly. A firm press helps prevent a crumbly crust when serving.
Beat the cream cheese. In a large bowl or stand mixer, beat the softened cream cheese with 1 cup (200g) granulated sugar until smooth and free of lumps. Scrape the bowl down as needed to ensure even mixing.
Add sour cream and flavor. Add the 1 cup (240g) full-fat sour cream, 1 teaspoon vanilla extract, and 2 teaspoons fresh lemon juice if using. Mix until smooth. The lemon is optional but adds a bright lift.
Add the eggs. Add the 3 large eggs one at a time, mixing on low speed until just combined after each addition. Do not overmix; overbeating can incorporate air that causes cracking.
Prepare the water bath. Wrap the outside bottom and sides of the springform pan tightly with aluminum foil to protect from water. Place the wrapped springform pan in a larger roasting pan, then pour about 1 inch of hot water into the roasting pan to create a gentle steam environment.
Bake the cheesecake. Pour the cheesecake batter over the pre-baked crust. Place the roasting pan with the water and springform into the oven. Bake for 55 to 70 minutes, until the edges are set but the center remains slightly wobbly when the pan is gently shaken.
Cool gradually in the oven. Turn off the oven and leave the cheesecake inside with the door slightly ajar for 1 hour. This slow cooling helps prevent cracks.
Chill. Remove the cheesecake from the oven, unwrap the foil, and allow it to come to room temperature. Refrigerate for at least 4 hours, or preferably overnight, before serving to let the texture fully set.
Tip: For cleaner slices, run a hot towel around the knife between cuts.
Recipe Details
- Prep Time: 25 minutes (plus 10 minutes crust bake)
- Cook Time: 55 to 70 minutes
- Total Time: About 6 hours and 30 minutes including 1 hour oven cooling and 4 hours refrigeration; overnight chill is best
- Servings: 12 slices
- Calories: Approximately 590 kcal per serving
Tips, Storage & Variations
- Baking tips: Use room temperature cream cheese and eggs to avoid lumps. Mix on low speed and stop as soon as ingredients combine to reduce trapped air.
- Cracking prevention: Cool slowly in the turned-off oven and avoid overbaking to minimize cracks.
- Storage: Store covered in the refrigerator for up to 4 days. Keep the springform base or transfer to an airtight container.
- Freezing: For longer storage, wrap the chilled whole cheesecake tightly in plastic wrap and foil, or slice and wrap individual pieces. Freeze up to 1 month. Thaw overnight in the refrigerator before serving.
- Flavor variations using only the listed ingredients:
- Lemon-bright: Increase the 2 teaspoons lemon juice to 1 tablespoon for a more pronounced citrus note while staying within provided ingredients.
- Extra tang: Stir an additional tablespoon of sour cream into the top of the batter before baking for a slightly tangier finish.
- Simpler sweetness: Reduce the 1 cup (200g) sugar in the filling by 1 to 2 tablespoons if you prefer a less sweet dessert.
- If you enjoy other rich variations, try a coffee-infused take such as the espresso version found at espresso cheesecake decadent dessert recipe for inspiration.
FAQ
Frequently Asked Questions
How do I know when the cheesecake is done?
The edges should be set and slightly puffed, while the center remains a little wobbly. The residual heat will finish cooking it as it cools.Can I use low-fat cream cheese or sour cream?
Yes, but texture and richness will be reduced. Full-fat yields the creamiest, most stable result.Do I have to use a water bath?
A water bath helps the cheesecake bake gently and reduces cracking, but you can bake without it if necessary.Why did my cheesecake crack?
Common causes are overmixing, overbaking, or rapid temperature changes. Cool slowly to reduce cracking.How long should the cheesecake chill before serving?
Refrigerate at least 4 hours, but overnight chilling gives the best texture and flavor.
People Also Ask
Can I make this cheesecake in advance for a party?
Yes, bake it the day before and chill overnight for easy serving on the event day.What pan size is best for this recipe?
A 9-inch springform pan is standard and works well with the ingredient quantities.Can I bake this without wrapping the pan in foil?
Wrapping prevents water from seeping into the pan during the water bath, so it is highly recommended.Is it safe to use frozen eggs in a cheesecake?
Thawed, well-stored eggs can be used, but fresh, room temperature eggs are preferred for best texture.How should I slice the cheesecake for neat pieces?
Use a hot, clean knife between cuts and wipe the blade each time for clean edges.Will the crust stay crisp after refrigeration?
The crust softens slightly after chilling, which is normal, but pressing it firmly and baking helps maintain some texture. For a different texture, check the caramel apple bars style at caramel apple cheesecake bars for ideas on firmer crusts and presentation.Can I reduce the sugar without affecting structure?
A small reduction is fine, but large cuts can change texture and taste. Try decreasing up to 2 tablespoons first.What is the best way to serve the cheesecake?
Serve chilled, cut with a warmed knife, and allow slices to sit a few minutes at room temperature for the creamiest mouthfeel.
Conclusion
I hope this classic cheesecake recipe becomes a go-to for your celebrations and cozy nights in. If you enjoy exploring variations or want to compare techniques, take a look at the rich menu inspiration from The Cheesecake Factory and the detailed home-baker method at The Best Cheesecake Recipe – Sugar Spun Run. Try it, make it your own, and share how it turns out with friends and family for warm, memorable dessert moments.