The Magic of Peppermint Holiday Bars
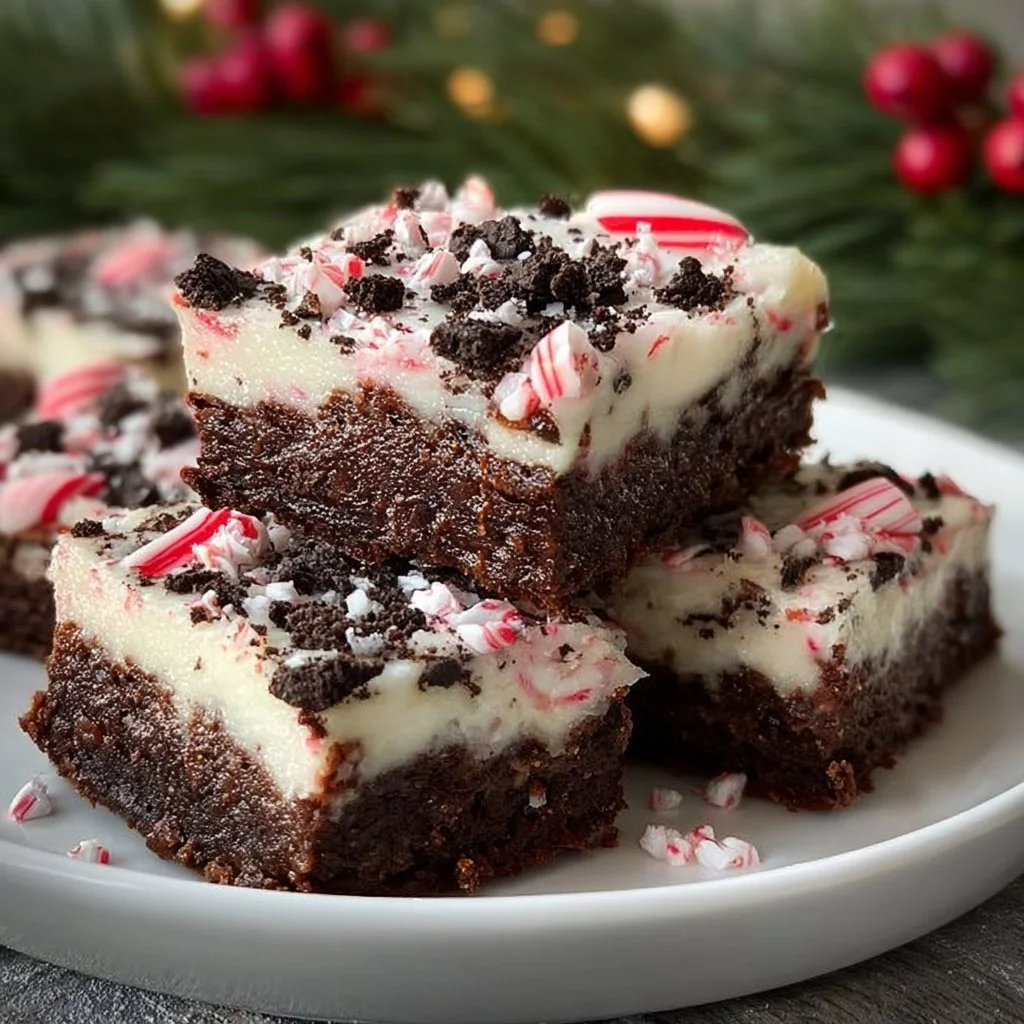
As the holiday season rolls in, the cozy aroma of peppermint wafts through the air, inviting warmth and laughter to our homes. These delectable Peppermint Holiday Bars are not only a treat for the taste buds but also a visual feast, showcasing swirls of white chocolate and vibrant red peppermint pieces atop a chewy, cookie-like base. This recipe is a wonderful blend of flavor and texture, perfect for busy weeknights or festive gatherings. With their rich, buttery finish and refreshing minty flavor, each bite is like a celebration wrapped in a bar. Trust me, once you try these festive goodies, they’ll quickly become a cherished family favorite!
So gather your loved ones and let’s get started on making The Magic of Peppermint Holiday Bars, filling your kitchen with delightful scents and sweet memories.
Understanding This Recipe
Peppermint-flavored treats hold a special place in holiday traditions around the globe. The combination of peppermint and chocolate dates back centuries and reflects the spirit of the season—fun, joy, and togetherness. These bars are inspired by the classic peppermint bark that many enjoy, but with an added twist of texture and richness that can only come from a cookie base. The use of white chocolate and crushed peppermint not only delivers a sweet yet refreshing bite but also adds a festive pop of color, making them a perfect centerpiece for any holiday dessert table.
The method for making these bars is straightforward, making them an excellent choice for even novice bakers. Utilizing a one-pan approach means cleanup is a breeze—a true gift during the sometimes-chaotic holiday season. They’re often served at gatherings, enticing guests with their vibrant appearance and delightful aroma. You’ll be surprised by how quickly they disappear when placed on the dessert table, and they even make a splendid gift when packaged in a decorative box.
Why You’ll Love This Recipe
You’ll adore these bars for their delightful combination of flavors and ease of preparation.
Easy Preparation: With just a few simple steps and common ingredients, you can whip up a batch that’s both beautiful and delicious without spending hours in the kitchen.
Flavor Complexity: The combination of rich buttery cookies, sweet white chocolate, and persistent peppermint creates a flavor profile that dances on your tongue—sweet, creamy, and refreshing all at once.
Family-Friendly: These bars are a hit with both kids and adults, making them a versatile dessert for holiday parties, potlucks, or cozy family movie nights.
Budget-Friendly: With just a handful of ingredients, these bars are affordable to make, allowing you to share the joy of baking without breaking the bank.
Ingredient Flexibility: Feel free to adjust the recipe with different chocolate types or add-ins like nuts or dried fruit, making it suit your family’s preferences.
Your Guide to Making Peppermint Holiday Bars at Home
These magical bars come together in no time with just a few kitchen essentials: an oven, mixing bowls, a baking pan, and some basic measuring tools. The recipe takes about 10 minutes of prep time and 25 minutes of baking, allowing you to focus on enjoying the holiday spirit.
Ingredients
- 1 cup unsalted butter (room temperature, for a moist, tender base)
- 1 cup brown sugar (adds depth of flavor and a hint of caramel)
- 1 cup granulated sugar (for sweetness and lightness)
- 2 large eggs (provide structure and moisture)
- 2 teaspoons vanilla extract (for that irresistible aroma)
- 3 cups all-purpose flour (the backbone of the bars)
- 1 teaspoon baking powder (for fluffiness)
- 1/2 teaspoon salt (enhances the overall flavor)
- 1 cup white chocolate chips (rich sweetness that balances the mint)
- 1/2 cup crushed peppermint candies (for that festive, refreshing burst)
Directions
Preheat the Oven: Set your oven to 350°F (175°C). The warming air will not only make your kitchen a cozy place but also prepare the batter for the perfect bake.
Mix the Butter and Sugars: In a large bowl, cream together the room-temperature butter, brown sugar, and granulated sugar using a hand mixer or stand mixer until light and fluffy—about 3 minutes. The aroma of sweet butter combined with sugar is delightful!
Add the Eggs and Vanilla: Beat in the eggs one at a time, mixing well after each addition. Add the vanilla extraction, allowing the sweet and aromatic scents to fill your kitchen.
Combine the Dry Ingredients: In a separate bowl, whisk together the flour, baking powder, and salt. Gradually add this mixture to the wet ingredients, mixing until just combined. Be careful not to overmix, as this could lead to dense bars.
Incorporate the White Chocolate and Peppermint: Gently fold in the white chocolate chips and crushed peppermint candies. You should see a cheerful swirl of colors start to form.
Transfer to Pan: Line a 9×13 inch baking dish with parchment paper for easy removal and pour the batter into the pan, smoothing it out evenly. The vibrant red of the peppermint pieces will be a lovely surprise in every slice!
Bake and Cool: Bake for 20-25 minutes, or until the edges are lightly golden and a toothpick inserted in the center comes out clean. Allow them to cool in the pan for about 10 minutes before transferring to a wire rack to cool completely.
What to Serve With Peppermint Holiday Bars
These Peppermint Holiday Bars are perfect for any festive occasion and can be paired beautifully with a variety of options.
Hot Chocolate: A rich mug of hot chocolate topped with whipped cream complements the peppermint flavor perfectly. The warmth adds comfort to each bite of the cool, minty bars.
Coffee or Espresso: Brewed coffee or a shot of espresso can balance the sweetness of the bars with its deep, robust taste—perfect for a cozy afternoon treat.
Vanilla Ice Cream: A scoop of vanilla ice cream adds a creamy contrast to the chewy bars and enhances the overall seasonal flavor experience.
Fruit Salad: The fresh, juicy notes of a fruit salad can provide a refreshing contrast to the sweetness of the bars, making for a delightful combination.
Top Tips for Perfecting Peppermint Holiday Bars
The right technique can elevate your bars from good to spectacular. Here are some tips to keep in mind:
Ingredient Swaps: If you want to change it up, feel free to substitute dark chocolate for white chocolate for a richer flavor.
Spice Adjustments: Add a pinch of cinnamon or nutmeg to the batter for an extra depth of holiday warmth.
Equipment Advice: Using a light-colored baking pan can help ensure even cooking and prevent the bottom from browning too quickly.
Storage Tips: Store leftover bars in an airtight container at room temperature for up to five days.
Mistakes to Avoid: Overmixing the batter can lead to dense bars, so mix until the ingredients are just combined.
Variations & Add-Ins
If you’re feeling adventurous, consider these variations for your Peppermint Holiday Bars:
Nutty Twist: Add 1 cup of chopped walnuts or pecans to the batter for a crunchy texture.
Dairy-Free Option: Use dairy-free butter and chocolate chips for a delicious vegan alternative.
Mint Chocolate Style: Replace white chocolate with semi-sweet chocolate chips for a classic mint-chocolate flavor.
Kid-Friendly Version
To make these bars appealing to kids, consider simplifying the peppermint flavor by reducing the amount of crushed candy. You can also decorate the top with fun holiday sprinkles or even marshmallows, turning the bars into an engaging treat that kids can help create and enjoy.
Storing and Reheating Tips
Proper storage is key to maintaining the deliciousness of your Peppermint Holiday Bars. Store them in an airtight container at room temperature for up to five days. If you want them to last longer, consider refrigerating them, where they can stay for up to two weeks. Just ensure you separate layers with parchment paper to avoid sticking.
When you’re ready to enjoy leftover bars, you can easily reheat them in the oven or microwave. For oven reheating, place them on a baking sheet at 350°F for about 5-10 minutes, until warmed through. If using a microwave, heat them in 10-second intervals for a few seconds until just warm. These methods will keep the bars soft and delightful!
FAQs
Q: Can I make these bars ahead of time?
Absolutely! You can bake the bars a few days in advance and store them in an airtight container. They often taste even better the next day as the flavors meld.
Q: What if I don’t have peppermint candies?
You can substitute crushed candy canes or even mint chocolate chips as a flavorful alternative.
Q: Can I freeze these bars?
Yes! Wrap the cooled bars tightly in plastic wrap and then foil, or use a freezer-safe container. They can be frozen for up to three months.
Q: How do I adjust this recipe for dietary restrictions?
Feel free to use gluten-free flour for a gluten-free version or coconut oil for a dairy-free option.
Q: Can I cut these bars into different shapes?
Absolutely! Once cooled, feel free to cut them into festive shapes—like stars or gingerbread men—for a fun seasonal twist.

In conclusion, The Magic of Peppermint Holiday Bars is a delightful addition to any festive occasion. Their rich flavor, inviting aroma, and beautiful presentation make them a holiday favorite. So, gather your family, unleash your inner baker, and create sweet memories this season. Try it tonight and let me know how it turned out!
PrintThe Magic of Peppermint Holiday Bars

These Peppermint Holiday Bars showcase swirls of white chocolate and crushed peppermint atop a chewy cookie-like base, perfect for festive gatherings.
- Prep Time: 10 minutes
- Cook Time: 25 minutes
- Total Time: 35 minutes
- Yield: 16 servings 1x
- Category: Dessert
- Method: Baking
- Cuisine: American
- Diet: Vegetarian
Ingredients
- 1 cup unsalted butter (room temperature)
- 1 cup brown sugar
- 1 cup granulated sugar
- 2 large eggs
- 2 teaspoons vanilla extract
- 3 cups all-purpose flour
- 1 teaspoon baking powder
- 1/2 teaspoon salt
- 1 cup white chocolate chips
- 1/2 cup crushed peppermint candies
Instructions
- Preheat your oven to 350°F (175°C).
- In a large bowl, cream together the butter, brown sugar, and granulated sugar until light and fluffy (about 3 minutes).
- Beat in the eggs one at a time, followed by the vanilla extract.
- In a separate bowl, whisk together the flour, baking powder, and salt. Gradually add this to the wet ingredients and mix until just combined.
- Gently fold in the white chocolate chips and crushed peppermint candies.
- Pour the batter into a lined 9×13 inch baking dish and smooth it out evenly.
- Bake for 20-25 minutes, until the edges are lightly golden and a toothpick comes out clean. Allow cooling in the pan for 10 minutes before transferring to a wire rack.
Notes
Store leftover bars in an airtight container for up to five days. They can also be refrigerated for up to two weeks.
Nutrition
- Serving Size: 1 bar
- Calories: 250
- Sugar: 15g
- Sodium: 150mg
- Fat: 12g
- Saturated Fat: 7g
- Unsaturated Fat: 4g
- Trans Fat: 0g
- Carbohydrates: 32g
- Fiber: 1g
- Protein: 2g
- Cholesterol: 40mg
Keywords: peppermint, holiday, dessert, bars, chocolate, festive